As an agency we frequently use Middleman in combination with DatoCMS for our projects because it is still one of the simplest and quick-to-develop solution to build a static website. Everything runs smoothly with Middleman until one has to deal with processes that require more complex dynamic interaction, the most demanded one being definitely authentication.
Since it is a widely spread problem we wanted to share this neat and easy to setup integration to our usual stack, Netlify Identity that adds the possibility to manage authentication to any project. We also chose React to avoid getting tangled in complicated Ajax and JQuery logic or having to switch to a Javascript based generator like Gatsby. React is in fact a much simpler tool to deal with dynamic interaction, it is quite simple to install and can be re-used multiple times for different projects. Moreover since we use Netlify to host our static websites we wanted to give a try to its Identity feature to manage users and authentication.
The experiment was a success and now we use this solution widely in our agency projects.
To sum it up here is the complete stack we chose for this tutorial:
- Middleman static website generator, but you can choose your favourite ;)
- React to create a user interface for the authentication part.
- Netlify to host our website and Netlify Identity to manage our signed users.
- DatoCMS to provide content.
- GoTrue API open-source, self-standing API service for handling user registration and authentication for JAM projects.
The goal
To make it easier to notice the “before and after” effect, we cloned a “The Office” fan site made with Middleman and DatoCMS that you can find among the DatoCMS examples sites. Download the original project here.
The goal is to make the seasons page accessible only to those who have an account, like it was premium content. For the purpose of this tutorial we will just show/hide the link, but the next step would be to implement a better discrimination using a lambda function that renders the content via React only to the signed in user.
This post does not want to go into some of the deeper technicalities but aims at showing the logic behind our decision to use this stack and to share a little bit of knowledge with a working example :)
The final result will look something like this:

You can visit the complete site here, and download the full project here.
Please identify yourself
Netlify offers two options to manage the Identity feature, a widget that provides a quick solution, and an open source GoTrue JS library, that basically exposes the methods used by the widget. The big perk of the library, in opposition to the ready-made Netlify Identity widget, is that it allows you to design your own interface and to keep in line with your brand identity and enable continuity in the overall user experience without significantly adding to your page weight.
Netlify super quick setup
We chose to be faithful to our web-designer and added Netlify Identity Javascript client library.
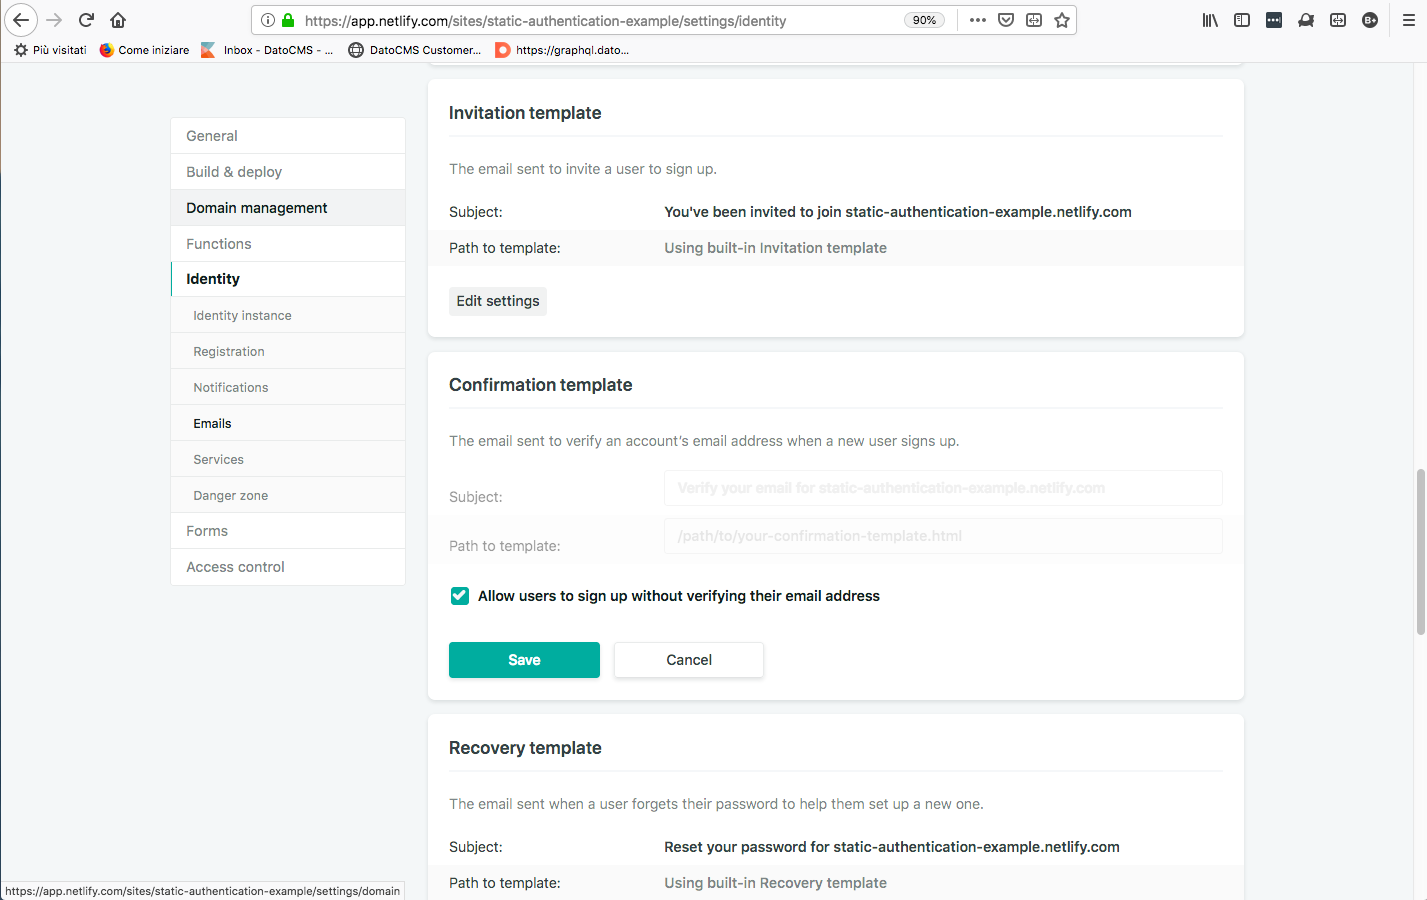
yarn add gotrue-jsTo allow Netlify to manage the identities on your website you will have to activate “identity” from your Netlify account.
For the purpose of this tutorial we enabled the signup without email confirmation option and we will only use the signup/signin methods, but you can experiment with all GoTrueJS options.
React to the rescue
Independently from what you chose as static site generator we will let React discriminate who can see some premium content. So basically we want React to take care of:
- Rendering a signin/signout button.
- Displaying a signin/signup form that allows a user to authenticate.
- Hiding/showing some content that is accessible only if the user is logged in.
In the javascripts create a folder named “auth” to separate your React files from other scripts. Then an index.js file that “attaches” React to static html.
import ReactDOM from "react-dom"
import React from "react";
import App from "./App";

ReactDOM.render(<App />, document.getElementById("react-root"));
Your tree should look like this
|- source
  ...
  |- javascripts
    |- auth
      |- App.js
      |- AuthBar.js
      |- AuthForm.js
      |- index.js
You will need to setup Webpack and Babel, here is a tutorial for the minimal setup.
Routing
Our App.js file will serve as the router of our React app and will render the proper component following the authentication logic. To do that we use React router.
AuthBar.js will provide the authentication menu and will be rendered as a part of the main navigation bar using React portal. So in our navbar.html we will have to add a div with an id (“#header-auth-navbar”) to “attach” the React component.
header.main-navigation
  ...
  = link_to "Homepage", "/index.html"
  #header-auth-navbar
Check if a user is logged in
Before we create our authorization menu we need to implement a method that checks if the user is logged in, in order to display the right content (premium /regular, logout/ signin button).
To do that we create a HOC component that will listen if the current user has changed and updates the DOM accordingly.
The authentication form
The logic of a signin and a signup form are similar though they make separate API calls. For the purpose of this tutorial we will tackle only the sign in component while in the full example project we switch between the signin/signup actions according to the route.
We will use Formik to build up the form, because it provides some useful methods to manage the component state. In Formik’s .onSubmit() function we will call the GoTrueJS library method .login() providing three arguments: email, password and a third argument that saves the current session (not documented on the Netlify docs). The query will check if an entry with that email exists in your Netlify project and then will save a session with an expiring date, otherwise will save the error message in the component’s state.
You can render the error by checking if this.state.error is not undefined.
auth.login(values.email, values.password, true)
  .then(response => {
    actions.setSubmitting(false);
    Alert.success('You signed in successfully!');
    this.props.history.push("/");
  })
  .catch(error => {
    this.setState({error: error.json.error_description});
    actions.setSubmitting(false);
  });
A SignIn Form should look something like this
Once you are logged in you should see the link to the premium content, a welcome message and the logout link.

In conclusion we found out that adding such an authentication procedure has a lot of pros because it unlocks the possibility to create a complex website, with, for example, an admin area, premium users services etc. while keeping all the advantages of having a static website!