In this tutorial, we will go over how to make changes to content schema in a DatoCMS project safely, without interfering with production, and with maximal flexibility for testing before merging.
Dato Environments
You have created a website or app that uses DatoCMS to handle content, and everything is up and running in production. But now you need to make changes to the content structure. How can you do it safely, making sure you do not affect what's in production? In this tutorial we will go over how to use Dato's sandbox environments and migration scripts to achieve just that. Let's dive right in!
Every DatoCMS project has a primary environment, which stores all of the project's data for production, including models, records, uploads, SEO settings, locales and timezone settings, as well as Dato dashboard settings, plugins, the project's UI theme and the content navigation bar. The primary environment is where editors manage the project's content.
Additionally, a project can have any number of sandbox environments. These always start up as exact copies (or forks) of the primary environment and are intended to be used for testing and development. Sandbox environments enable developers to modify the project's structure without interfering with what's in production. You can think of using sandbox environments as something akin to working with git branches.
The primary environment can be forked directly in the DatoCMS dashboard or through the command line. This is how to do it on the dashboard (we'll get back to using the Dato CLI below.):
Go to Settings > Environments and then click on Fork.

You will be asked to give a new name to the copy of the primary environment that is being created. The new sandbox will be identified by that name. Once the environment has been created, we can switch from one environment to another with the click of a button on the top right part of the dashboard:
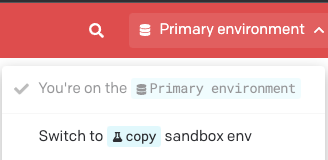
You can set the endpoint in your code to fetch data from a sandbox environment identifying it by name. If no name is specified, data is fetched from the primary environment. The DatoCMS docs explain different ways to do this. Here you'll find instructions on how to do it specifically for a NextJS project.
Recommended Workflow
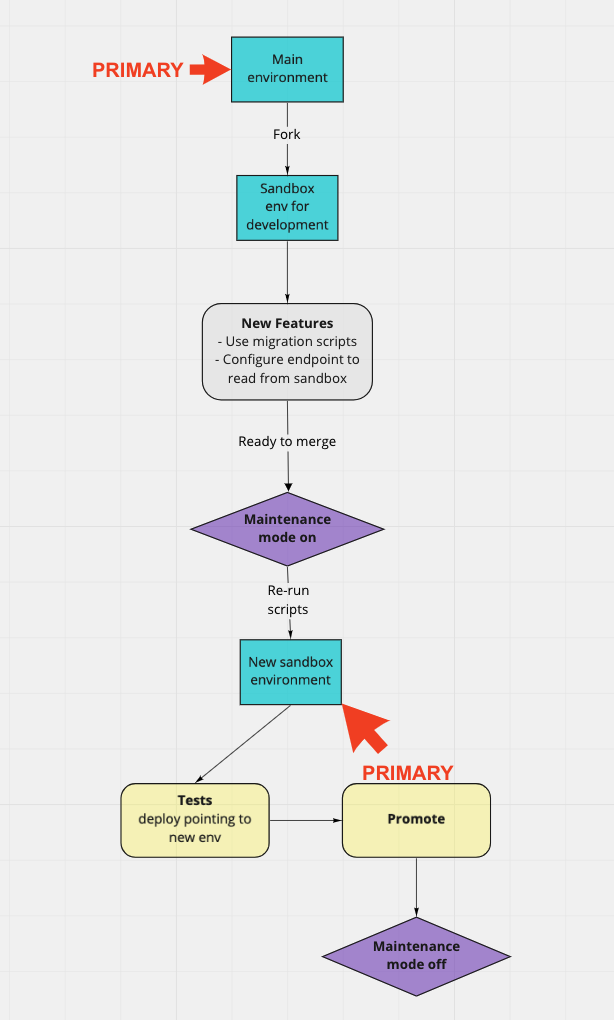
Environments are specifically useful to alter to content structure without interfering with production; this is the workflow DatoCMS recommends:
- Create a new sandbox environment by forking the primary environment (with the fork button in the dashboard or from the command line).
- Work exclusively inside this environment, making changes with migration scripts rather than from the user interface.
- When you’re ready, turn maintenance mode on (with a button on the dashboard or from the command line). Editors will not be able to add new content to the project.
- Run your migration scripts, which first make a copy of the primary environment (so it is up to date with production) and then modify this new copy in accordance with the scripts.
- Deploy a new version of your website or app pointing to the new sandbox and test that everything works as expected.
- Promote the new sandbox to primary (with a button in the dashboard or from the command line).
- Your old primary environment will now be a regular sandbox environment, and it can serve as backup if needed.
- Turn maintenance mode off.
Installing the CLI
The first thing we need to do is to install the Dato CLI. If you use npm, you can use the following command:
npm install -g datocms-client
If you use yarn, run:
yarn global add datocms-client
In order to run migrations, we also need to set up the full-access API token, which can be found on the Dato dashboard under Settings > Permissions > API Tokens. There are various ways to set the token, directly on the command line or loading environment variables form an .env file; all are described here.
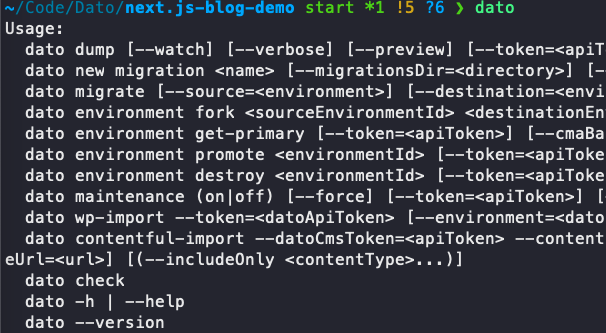
Now we can use the client, with various functions. If you run
datoon the command line, you can see a list of all the commands that are available and the various flags that can be passed to each of them (in the picture below here I have cut some of the flags, but you can see all the commands currently available):
The project
In this tutorial, we will be working on a simple blog project drawn from this Next.js blog template. We changed some of the content, but the structure is the same. The project contains blog posts, author records, categories, and a homepage model.
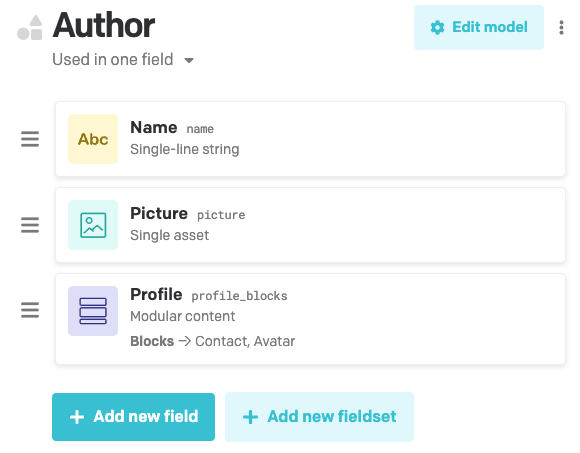
We will be focusing on the author model, which is structured in this way:
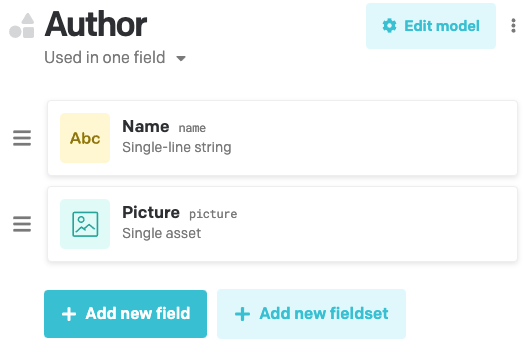
_______________________________________________________________________________
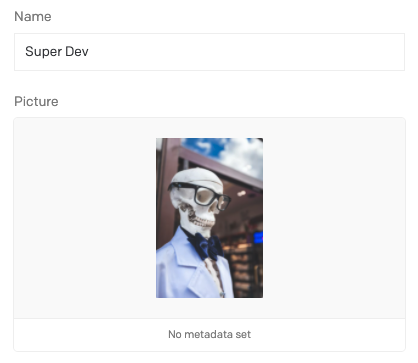
Here's what a single author record looks like:
_______________________________________________________________________________
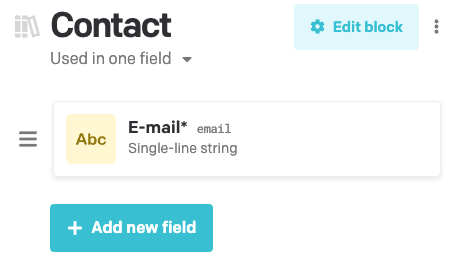
We're going to create two new blocks called Contact and Avatar. This is what the Contact block will look like:
_______________________________________________________________________________
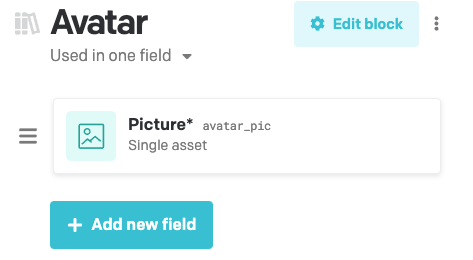
And this is will be our Avatar block:
_______________________________________________________________________________
After creating the two blocks, we're going to add a new modular content field callled Profile to the author model. The Profile field will contain records created with either Avatar or Contact blocks. So, this is what the author model will look like at the end of the tutorial:
_______________________________________________________________________________
And this is what a full author record will look like:
The docs for writing migration scripts are detailed and exhaustive. For our purposes, we will be following the steps shown in this example for creating a modular content field. Adapted to our purposes, this are the steps we need to follow:
- Create a contact block.
- Create string fields.
- Add modular content field to the author model and set it to take the block we created.
After we have done (1) to (3), we will create a block with an image field and add it to the modular content field created in step (3). Lastly, we'll see how to add content to a record, both by migrating existing content and by directly passing new content in a script.
Create a contact block
We begin by creating a new migration file with the command dato new migration followed by the name we want to give to our script. The first time we do this in our project, a new migrations directory will be created in the root of the project, with the new file inside. The file name begins with a timestamp, followed by the name we passed to the command.
dato new migration 'Create contact block'
We can now go to the migrations dir and find our new file within it. Like all new migration files, it comes pre-filled with some sample code; we can go ahead and delete everything inside the module.exports function, so we'll have this:
'use strict';

module.exports = async (client) => {
}
Now we're ready to look into the details of the script we need to write to create a new block. The docs for Dato's content management API show us exactly how to do it, using code just like the one used for creating a new model, but passing modularBlock: true.
So, to create our Contact block, we need to add this inside the module.exports function`:
  const contactBlock = await client.itemTypes.create({
    name: 'Contact',
    apiKey: 'contact_block',
    modularBlock: true,
  });
To run the migration, we use the command dato migrate followed by the flag --destination= and the name of the new sandbox environment we will create, in which our migration will run. In this tutorial, we call our new sandbox environment Example.
dato migrate --destination=example In the console, we can see the new sandbox being forked from the primary environment and the migration running.

That's it! We can now go to our DatoCMS dashboard and switch to the newly-created Example environment. If we click on the Blocks Library, we'll see the Contact block we just created.
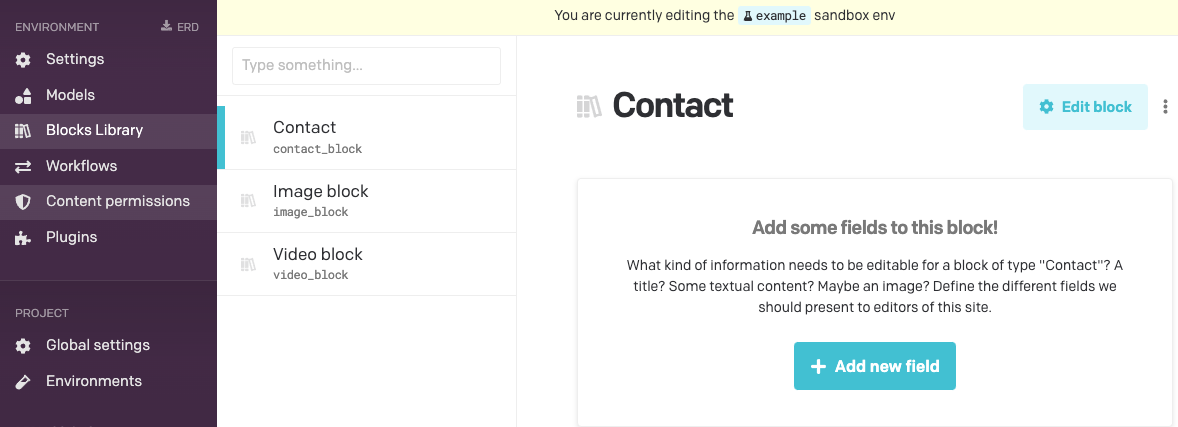
The new block is empty, though, so now we need to create a field inside it.
Add a field to the block
As always, we need to begin by creating a new migration file.
dato new migration 'Add fields to contact block'
To create a new field in the Contact block, we need to pass the block's id and an object with label, api key, field type, validators and appearance properties to the client.fields.create function.
In general, when creating a new field, the thing to do is go to the docs and scroll down to the type of field we wish to create. There we'll find specific instructions for the values we need to pass for the field type, as well as the available validators and what to pass for the editor in the appearance property.
In this case, we'll create a single string field called "E-mail":
'use strict';

module.exports = async (client) => {
  const contactBlock = await client.itemType.find('contact_block');

  const emailField = await client.fields.create(contactBlock.id, {
    label: 'E-mail',
    apiKey: 'email',
    fieldType: 'string',
    validators: {
      required: {},
      format: {
        predefined_pattern: "email",
      },
    },
    appearance: {
      editor: 'single_line',
      parameters: {
        heading: false,
      },
      addons: [],
    },
  });
}
Now we're ready to run the migration with the dato migrate command, but instead of the --destination flag (which creates a new environment), we will pass the --source and --inPlace flags to tell Dato to run the new migration in an existing environment.
dato migrate --source=example --inPlace
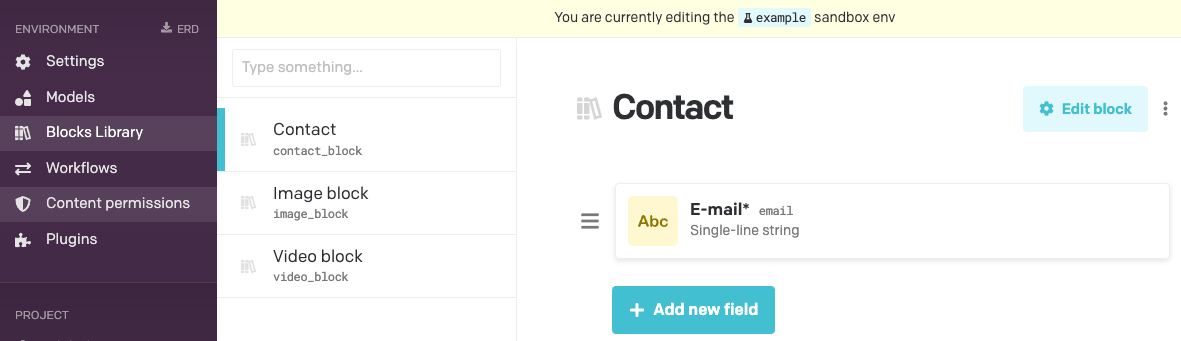
When the migration is done running...

we can go to our DatoCMS dashboard to see the result:
Add a modular content field to the author model
Now our contact block is ready, and we can use it to add a modular content field to the author model, which will accept contact blocks. As usual, we begin by creating a migration file.
dato new migration 'Add profile blocks to author model'
To address any doubts, we can always consult the docs on how to create a new field. In the list of "Available field types", if we click on modular content we see the following:
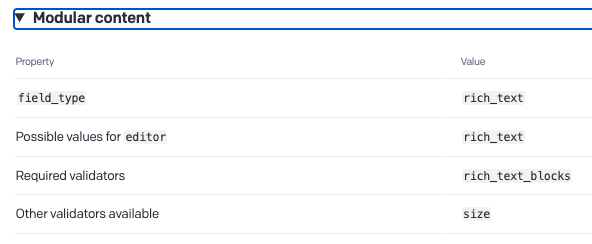
In the list of "Validators", if we click on rich_text_blocks we get this:
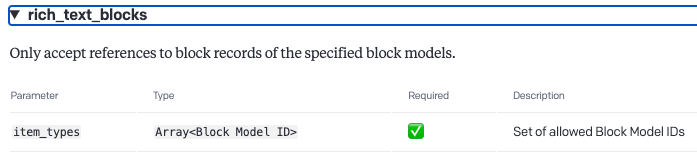
With this in mind, we are now ready to write a script that adds a Profile field to the author model. As you can see below, use the client.fields.create function and pass it the author model id, and an object with all the data needed to create the new modular content field.
'use strict';

module.exports = async (client) => {
  const contactBlock = await client.itemType.find('contact_block');
  const authorModel = await client.itemType.find('author');

  const profileBlockField = await client.fields.create(authorModel.id, {
    label: 'Profile',
    apiKey: 'profile_blocks',
    fieldType: 'rich_text',
    validators: {
      richTextBlocks: {
        itemTypes: [
          contactBlock.id,
        ]
      }
    },
    appearance: {
      editor: 'rich_text',
      parameters: {
        start_collapsed: true
      },
      addons: [],
    },
  });
}
Then we run the migration with
dato migrate --source=example --inPlace
And after running the script, we can check the result in the DatoCMS dashboard:
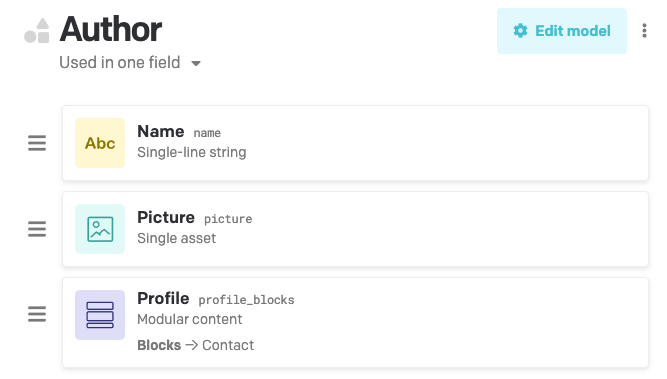
The author model has a new modular content field that accepts Contact blocks.
Add an image block to the profile field
We will now condense a few steps into a single migration file. Our goal is to create a new block, which we will call Avatar, and which will have an image field. Then we will update the Profile field in the author model so that it accepts Avatar blocks in addition to Contact blocks.
First we create the migration file:
dato new migration 'Add avatar image block to profile field'
And in our script, the first step will be to create a new Avatar block.
  const avatarBlock = await client.itemTypes.create({
    name: 'Avatar',
    apiKey: 'avatar_block',
    modularBlock: true,
  });
Then we need to add a single asset field (of type image) to the newly-created block:
  const imageField = await client.fields.create(avatarBlock.id, {
    label: 'Picture',
    apiKey: 'avatar_pic',
    fieldType: 'file',
    validators: {
      required: {},
      extension: {
        predefined_list: 'image',
      },
    },
    appearance: {
      editor: 'file',
      parameters: {},
      addons: [],
    },
  });
And finally we need to add this block to the valid references for the modular content field in our author model:
  const profileBlockField = await client.field.find('author::profile_blocks');
  const validBlockTypes = profileBlockField.validators.richTextBlocks.itemTypes;

  client.field.update(profileBlockField.id, {
    validators: {
      richTextBlocks: {
        itemTypes: [...validBlockTypes, avatarBlock.id]
      }
    }
  });
This is what the full migration file looks like:
'use strict';

module.exports = async (client) => {
  const avatarBlock = await client.itemTypes.create({
    name: 'Avatar',
    apiKey: 'avatar_block',
    modularBlock: true,
  });

  const imageField = await client.fields.create(avatarBlock.id, {
    label: 'Picture',
    apiKey: 'avatar_pic',
    fieldType: 'file',
    validators: {
      required: {},
      extension: {
        predefined_list: 'image',
      },
    },
    appearance: {
      editor: 'file',
      parameters: {},
      addons: [],
    },
  });

  const profileBlockField = await client.field.find('author::profile_blocks');
  const validBlockTypes = profileBlockField.validators.richTextBlocks.itemTypes;

  client.field.update(profileBlockField.id, {
    validators: {
      richTextBlocks: {
        itemTypes: [...validBlockTypes, avatarBlock.id]
      }
    }
  });
}
We can now run the migration...
dato migrate --source=example --inPlace
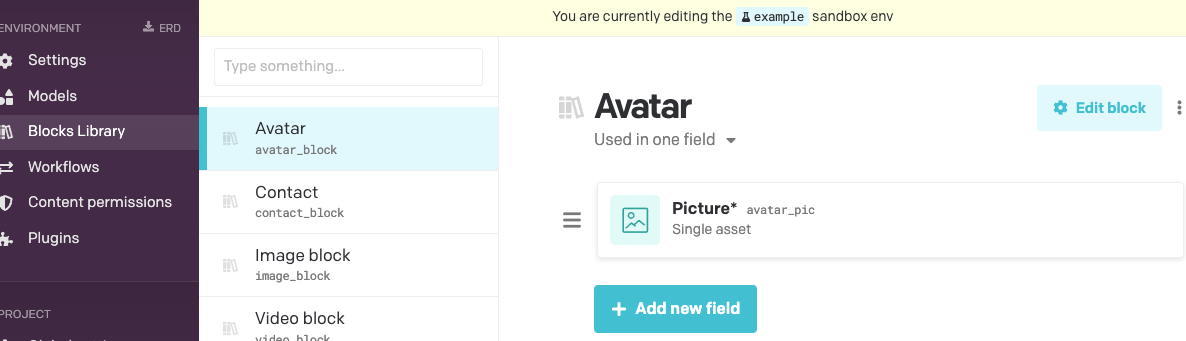
And check the result in the Dato dashboard. You should find the new Avatar block in the Blocks Library:
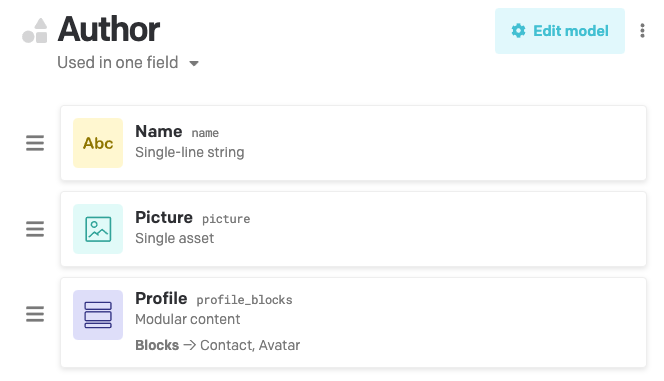
And this is the author model with the updated Profile field:
Add content to a record
Although migration scripts should be used primarily to alter the structure of the project, it is sometimes necessary to migrate content. We will go over how to add content to a record both by migrating existing content from one field to another and by directly adding new content. But first, as usual, we need to create a new migration file.
dato new migration 'Update author record with new profile blocks content'
As we go to write our script, the first thing to do is to look at the docs on adding a modular block to a record. As we can read there, we need to require the buildModularBlock function from the dato client, so we must add the following to the top of our file:
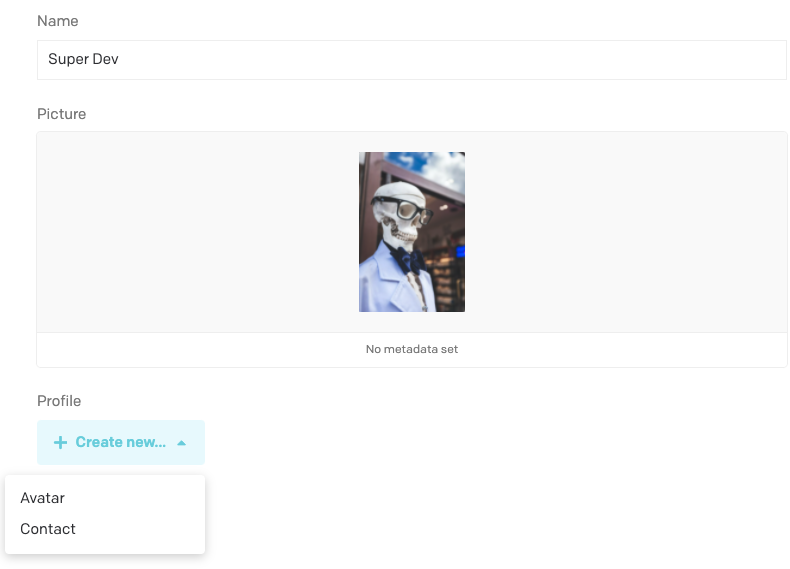
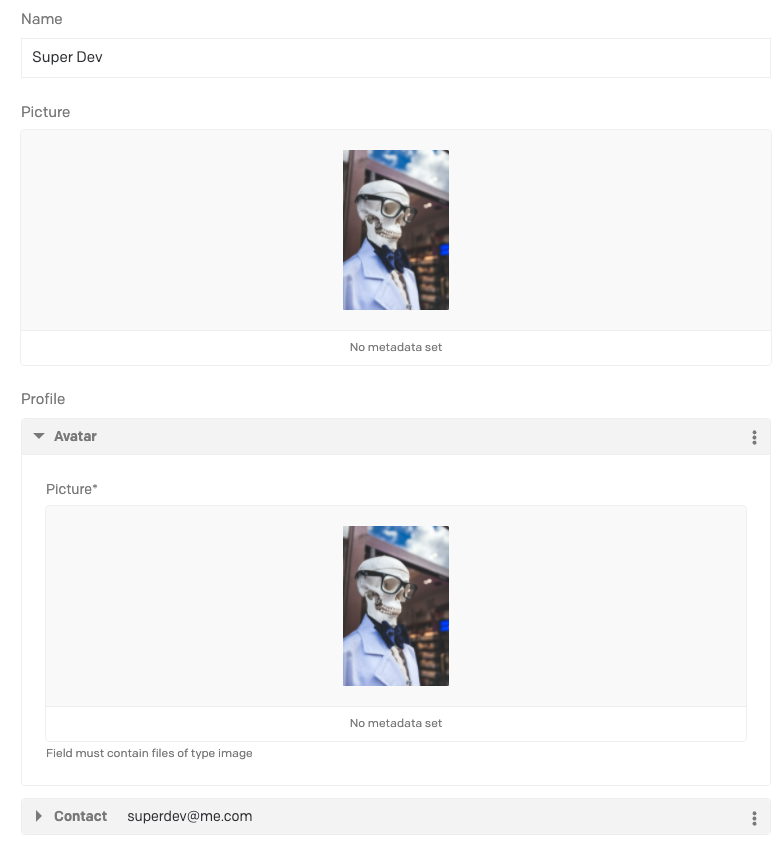
const { buildModularBlock } = require('datocms-client'); Then we need to find the record we will update. To do this, we'll list all our author records and then choose the one we want; in this case, we'll go for the one where the name field is "Super Dev". We will then update this record by adding two new modular content blocks to its Profile field; one will be of type Avatar and will contain an image with the same content as the one that already exists in the author image field. The other will be of type Contact and will have an email address that we will pass directly in the script.
'use strict';

const { buildModularBlock } = require('datocms-client');

module.exports = async (client) => {
  // Retrieve author records
  const authorRecords = await client.items.all(
    {
       filter: {
          type: 'author'
        }
      },
    {
        allPages: true,  // otherwise we get only the first page of results
    },
  );

  // Retrieve record for Super Dev
  const superDevRecord = authorRecords.find(rec => rec.name === 'Super Dev');

  // Content in existing picture field
  const superDevPicture = superDevRecord.picture;

  // Block types that we are going to insert
  const avatarBlock = await client.itemType.find('avatar_block');
  const contactBlock = await client.itemType.find('contact_block');

  // Update record
  const createSuperDevProfile = await client.items
    .update(superDevRecord.id, {
      profileBlocks: [
        buildModularBlock({
          itemType: avatarBlock.id,
          avatarPic: superDevPicture,
        }),
        buildModularBlock({
          itemType: contactBlock.id,
          email: 'superdev@me.com',
        }),
      ]
    });
  }
We are now ready to run the script with our familiar command
dato migrate --source=example --inPlace
and check the result in the dashboard. This is our updated record for the author called "Super Dev":
Conclusion
Now that we have created all the migrations we need, and are satisfied with the result, we can delete the Example environment and follow the workflow for incorporating these changes into production.
- Delete the Example sandbox either from the dashboard or with the command
dato environment destroy example. - Turn maintenance mode on either from the dashboard or with the command
dato maintenance on. If anyone is currently entering content in the project, the command will fail. We can pass the--force, and they will be forced off the project until maintenance is turned off. - Re-run migrations from the command line with
dato migrate --destination=environment_name. - This is the point at which you should set the endpoint in your project to read data from the new Dato environment and deploy your website or app to make sure everything works correctly.
- Promote the newly created environment to primary, either from the dashboard or with the command
dato environment promote environment_name. - Turn maintenance mode off either from the dashboard or with the command
dato maintenance off.
That's it! In the event that you need to rollback your changes, your old primary environment will still be there among your sandbox environments, so you can just revert to it by promoting it. As we've seen, all commands can be run from the command line, which makes it simple to automize the process in a CI/CD pipeline. Making changes to your content schemas with migration scripts is simple and versatile, and allows you to modify your content schema with complete peace of mind, knowing that you can play around with sandboxes without interfering with your production environment at all, and with maximal flexibility for testing before promoting new features to the primary env.
We recently held a lesson on this topics for HeadlessCreator's course on DatoCMS; if you're interested, you can see the beginning of our lesson in youtube or register in the HeadlessCreator website to see the full lesson.